


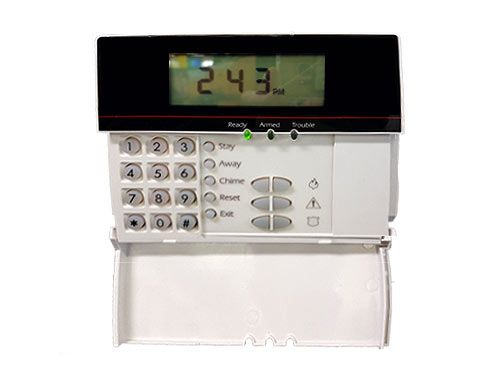
PC1565


Alarm Memory
Alarm Memory LED Keypad:
If an alarm occurred while the system was armed, the Memory light (or System light on a PC1555RKZ keypad) and the zone light corresponding to the zone which caused the alarm will flash for 30 seconds. After the 30 second period, the Memory (or System) light and zone light will stop flashing and the panel will return to the Ready state. Pressing the [#] key during the 30 second period will cancel the alarm memory display. To view other alarms, press [*] [3].
NOTE:The alarm memory is cleared each time the panel is armed so that any alarms showing are alarms that occurred only during the last armed period.
Alarm Memory LCD Keypad:
| View Memory<> |
|---|
| “Zone of Alarm” |
If an alarm occurred while the system was armed, this message will be displayed. Use the arrow (< >) keys to view which zones caused the alarm. If a zone is still in alarm, the display will show the following message to indicate that a zone is open…
| Secure System |
|---|
| Before Arming<> |
Upon disarming and if a trouble is present, this message will be displayed. Use the arrow (< >) keys to view which troubles are affecting the system.
NOTE: The alarm memory is cleared each time the panel is armed so that any alarms showing are alarms that occurred only during the last armed period.
Arm Disarm Bypass
Arming from an LED Keypad:
If the Ready light is ON, the system is ready for arming. If the Ready light is OFF, check to see that all doors and windows are closed and that motion is stopped in areas covered by motion detectors. The system cannot be armed unless the Ready light is ON indicating that all zones are closed and the system is in the Ready state.
Enter your [User Code]. As each digit is entered, the keypad sounder will beep. If the access code was entered incorrectly, the keypad buzzer will sound steadily for one second. If this occurs, press the [#] key and re-enter your [User Code]. If the correct access code is entered, the keypad sounder will beep quickly and the Armed light will come ON. Exit the premises through the door indicated by your installer as the Exit/Entry door. The panel will provide an exit delay period, indicated by keypad beeps, for you to exit the premises without causing an alarm. At the end of the exit delay period, all keypad lights, except the Armed light, will turn OFF and the system will be armed. You can restart the exit delay once by pressing the [Away] button before the exit delay expires. The exit delay time can be changed by your installer.
Arming from an LCD Keypad:
| Secure System |
|---|
| Before Arming<> |
When this message appears, one or more zones are not secured. To secure the system, close all doors and windows and cease all motion in areas covered by motion detectors.
| Enter Code to |
|---|
| Arm System <> |
When this message appears, use the arrow (< >) keys to verify that the system is clear of troubles and that no zones are bypassed unintentionally.
| Enter Code to |
|---|
| Arm System |
If this display is showing, the system is in the Ready state and may be fully armed. To arm the system, enter your [User code].
| Exit Delay in |
|---|
| Progress |
Once the correct user code has been entered, the display will be as shown. The panel will provide an exit delay period, also indicated by keypad beeps, for you to exit the premises without causing an alarm. You can restart the exit delay once by pressing the [Away] button before the exit delay expires. Exit through the door indicated by your installer as the Exit/Entry door.
| Exit Code to |
|---|
| Disarm System |
This message will be displayed once the exit delay expires and the system is fully armed.
| *WARNING* |
|---|
| Bypass Active |
If this message appears, be aware of which zones are bypassed and why.
Alternate Arming Methods:
Away Arming:
Arming the system in the Away mode will have all interior zones and perimeter zones active. If motion is detected in the interior zones, or if one of the perimeter zones is violated, the alarm sequence will begin. To arm in the Away mode, enter your [User code] and exit the premises through a designated Exit/ Entry door. The system will recognize that occupants have left the premises. Once the exit delay expires, the system will be fully armed. You can restart the exit delay once by pressing the [Away] button before the exit delay expires.
Audible Exit Fault:
In an attempt to reduce false alarms, the Audible Exit Fault is designed to notify you of an improper exit when arming the system in the Away mode. In the event that you fail to exit the premises during the allotted exit delay period, or if you do not securely close the Exit/Entry door, the system will notify you that it was improperly armed in two ways: the keypad will emit one continuous beep and the bell or siren will sound. If this occurs, you must re-enter the premises, enter your [User code] to disarm the system, and then follow the arming procedure again, making sure to exit the premises in the proper fashion. Your installer will inform you if the Audible Exit Fault feature has been enabled on your system.
Stay Arming:
This feature, if enabled by your installer, will allow you to arm the perimeter zones while leaving the interior zones inactive so that you can remain on the premises while the system is armed. When you enter your [User code] to arm the system and do not exit the premises through a designated Exit/ Entry door, the system will arm in the Stay mode, automatically bypassing the interior zones.
The interior zones can be reactivated at any time by entering [*] [1] at any keypad. If you reactivate the interior zones, be sure to only inhabit areas not covered by motion detectors. To access areas protected by motion sensors, you must enter your [User code] and disarm the system.
Arming Without Entry Delay:
If you wish to arm your system without the entry delay, enter [*] [9] then your [User code]. The Armed light will flash as a reminder that the system is armed and has no entry delay. An entry through any zone programmed as a delay zone will create an instant alarm.
Quick Arm:
When the Quick Arm feature is enabled, the system may be armed by simply pressing [*] [0]instead of your access code. Please note that pressing [*] [0] will only allow you to arm the system; to disarm, you must enter a valid [User code]. Your installer will inform you if the Quick Arm feature has been enabled on your system.
Auto Arming:
Your system can be programmed to automatically arm itself according to a programmed schedule. To program the auto arm time, enter [*] [6] followed by your [Master code]. Press [3]. Enter the time using the 24Hr format (00:00 – 23:59).
To enable or disable the auto arm feature, enter [*] [6] followed by your [Master code]. Press [2]to either enable or disable the feature. The keypad will beep 3 times if the feature is ON and once if it is OFF.
NOTE: The correct system time and date must be programmed in order for the auto arm feature to function properly.
Quick Exit:
When the Quick Exit feature is enabled, pressing [*] [0] while the system is armed will provide a two minute window for you to exit the premises. During this time, you may only open and close the designated Entry/Exit door once.Once the door is closed, the panel will end the two minute quick exit delay. If the door is opened again, or if the door is not closed after two minutes, or if another zone is opened, the panel will begin the entry delay. Your installer will inform you if the Quick Exit feature has been enabled on your system.
Disarming from an LED Keypad:
Enter the premises through a designated Exit/Entry door; entering by any other door will sound an immediate alarm. As soon as the Exit/Entry door is opened, the keypad will beep to indicate that the system should be disarmed. Go to the keypad and enter your [User code].
If an error is made entering the code, re-enter your [User Code] correctly. As soon as the correct code is entered, the Armed light will go out and the keypad will stop beeping. The correct User code must be entered before the entry delay period expires. If a valid access code is not entered during this time, the system will go into alarm. The entry time delay may be changed by your installer.
If an alarm occurred while the system was armed, the Memory light (or System light on a PC1555RKZ keypad) and the zone light corresponding to the zone which caused the alarm will flash for 30 seconds. After the 30 second period, the Memory (or System) light and zone light will stop flashing and the panel will return to the Ready state. Pressing the [#] key during the 30 second period will cancel the alarm memory display. To view other alarms, press [*] [3].
If a trouble was detected when the panel is disarmed, the Trouble light (or System light on a PC1555RKZ keypad) will turn ON. Please note that troubles will not display while the system is in the Alarm Memory Display mode.
Disarming from an LCD Keypad:
Upon entering through a designated Exit/Entry door, the keypad will beep and the entry delay will commence, reminding you to disarm the system. The keypad will display the following message…
| Entry Active |
|---|
| Enter Your Code |
Enter your [User code]. If an error is made in entering the code, re-enter the [User code]correctly.When a valid access code is entered, the keypad will stop beeping. If no alarms occurred while the panel was armed, and there are no troubles, the display will read…
| System Disarmed |
|---|
| No Alarm Memory |
After about five seconds, the system will return to the Ready state and the display will read…
| Enter Code to |
|---|
| Arm System |
| View Memory<> |
|---|
| “Zone of Alarm” |
If an alarm occurred while the system was armed, this message will be displayed. Use the arrow (< >) keys to view which zones caused the alarm. If a zone is still in alarm, the display will show the following message to indicate that a zone is open…
| Secure System |
|---|
| Before Arming<> |
| Enter Code to |
|---|
| Arm System<> |
Upon disarming and if a trouble is present, this message will be displayed. Use the arrow (< >) keys to view which troubles are affecting the system.
NOTE: The alarm memory is cleared each time the panel is armed so that any alarms showing are alarms that occurred only during the last armed period.
Zone Bypassing:
The zone bypassing function is used when access is needed to part of the protected area while the system is armed. Zones which are temporarily out of service due to damaged wiring or contacts may be bypassed to allow system arming until repairs can be made. Bypassed zones will not cause an alarm. Zones cannot be bypassed once the system is armed. Bypassed zones are automatically cancelled each time the system is disarmed and must be reapplied before the next arming.
To bypass zones from an LED keypad:
Start with the system in the Ready state. Enter [*] [1] [Zone (s) to be bypassed].
Enter the zone(s) as a two-digit number from 01 to 08. As each zone is bypassed, the corresponding zone light will turn ON. If a zone is bypassed by mistake, enter that zone number again; the zone light will turn OFF, indicating that the zone is not bypassed. Press [#] to return to the Ready state.
To bypass zones from an LCD keypad:
To bypass a zone, the system must be in the Ready state. The display will read…
| Enter Code to |
|---|
| Arm System<> |
Press the [*] key to enter the functions menu. The display will read…
| Press (*) for<> |
|---|
| Zone Bypass |
Press the [*] key to enter the zone bypassing mode. The display will read…
| Zone Search<> |
|---|
| “Zone Name” |
Use the arrow (< >) keys to find the zone to be bypassed and press the [*] key to select it. The display will read…
| Zone Search<> |
|---|
| “Zone Name” B |
Use the arrow (< >) keys to find the zone to be bypassed and press the [*] key to select it. The display will read…
Use the arrow (< >) keys to find the zone to be bypassed and press the [*] key to select it. The display will read…
| Zone Search<> |
|---|
| “Zone Name” O |
This display will be shown if a zone was open when you entered the bypassing command. The open zone will be represented by “O”. If you bypass the open zone, the “O” will be replaced by a “B”.
To exit the bypassing mode and return to the Ready state, press the [#] key.
Chime Mode
Door Chime Feature:
The door chime feature is used to provide a tone from the keypad each time a door or window is opened or closed. The doors and windows which will provide this indication are programmed by your installer.
To activate the door chime from an LED Keypad:
Enter [*][4] to turn the door chime feature ON and OFF. When the command is entered, the keypad buzzer will beep 3 times if the door chime feature is enabled and will sound one long beep if it is disabled.
To activate the door chime from an LCD Keypad:
Press [*] to enter the function list, then scroll to find…
| Press (*) For<> |
|---|
| Door Chime<> |
Press [*] or [4] to enable or disable the Door Chime feature. Press [#] to return to the Ready state.
Code Changes
Programming codes from an LED Keypad:
The Master Code:
To program the Master Code, enter [*] [5] [current Master Code] [40] [new Master Code]. The Master Code must be four digits unless otherwise indicated by your installer. Enter digits 0 through 9 only.
Press [#] to return to the Ready state.
NOTE: We recommend that the factory default or obvious codes such as [1111] or [1234] not be used.
Additional Codes:
Up to 32 additional access codes (01 through 32) may be programmed.
To program a new code:
Enter [*] [5] [Master Code] [code number 01 to 32] [new user code]. The code number is a double digit from 01 to 32. User codes must be four digits unless otherwise indicated by your installer. Enter digits 0 through 9 only. Press [#] to return to the Ready state.
If an access code already exists for the code number you have selected, it will be replaced by the new code. Be sure to record your new code(s)
To erase a code:
Enter [*] [5] [Master Code] [code number 01 to 32] [*]. Press [#] to return to the Ready state.
NOTE: The Master code cannot be erased.
Programming codes from an LCD Keypad:
Master Code:
Press the [*] key to enter the function list. Scroll (< >) to…
| Press (*) for<> |
|---|
| Access Codes |
Press [5] or [*]. The display will read…
| Enter Master |
|---|
| Access Code |
Enter your current [Master Code]. The display will read…
| (*) to Edit<> |
|---|
| User Code 40P |
“40P” represents the Master Code. Press the [*] key to indicate that you wish to program the Master Code. The display will read…
| Enter New Code |
|---|
| 1234 <> |
Enter the new [Master Code]. The Master Code must be four digits unless otherwise indicated by your installer. Enter digits 0 through 9 only. Once the new code is entered, the keypad will beep 3 times and the display will read…
| (*) to Edit<> |
|---|
| User Code 40P |
Keypad Functions
DSC PC 1565 Keypad Functions PC5508Z, PC5516Z, PC5532Z, LCD5500Z Keypads:
Press both (FIRE ICON) Keys for two seconds to send a FIRE transmission.
Press both (TRIANGLE ICON) Keys for two seconds to send an AUXILIARY transmission.
Press both (POLICE BADGE ICON) Keys for two seconds to send a PANIC transmission.
PC1555RKZ Keypad:
Press the [F] key for two seconds to send a FIRE transmission.
Press the [A] key for two seconds to send an AUXILIARY transmission.
Press the [P] key for two seconds to send a PANIC transmission.
NOTE: (All Keypads): The Fire, Auxiliary and Panic keys will NOT function unless programmed by the installer. If these keys are in service and the installer has enabled audible feedback, holding down the key for two seconds will cause the keypad sounder to beep indicating that the input has been accepted and transmission is underway.
Keypad Sounder Control:
The LCD keypad will allow you to select from 21 different keypad tones. From an LCD keypad, enter [*] [6] [Master Code] then use the arrow keys (< >) to scroll to the message “Keypad Buzzer Control”.
Press [*] to select. Use the arrow keys (< >) to scroll to the desired keypad sound level and press the [#] key to exit. This feature can be accessed on LED keypads by holding the [*] key.
LCD Keypads Only:
The following three options are accessed by entering [*] [6] [Master code]. Use the arrow (< >) keys to scroll to the appropriate message and press [*] to select.
Brightness Control:
The LCD keypad will allow you to select from 10 different backlighting levels. Use the arrow keys (< >) to scroll to the desired backlighting level and press the [#] key to exit.
Contrast Control:
The LCD keypad will allow you to select from 10 different display contrast levels. Use the arrow keys (< >) to scroll to the desired contrast level and press the [#] key to exit.
Viewing the Event Buffer from an LCD Keypad:
Select “View Event Buffer” from the [*] [6] menu. The keypad will display the event, event number, time and date along with the zone number and user code, if applicable. Press [*] to toggle between this information and the event itself. Use the arrow keys (<>) to scroll through the events in the buffer. When you have finished viewing the Event Buffer, press the [#] key to exit.
Reset Fire Alarms
Fire Alarm Operation
On a fire alarm, the bell or siren will pulse ON and OFF. The transmission of the alarm to the monitoring station is delayed for 30 seconds. If the alarm is not cleared within the 30 second delay, then it will be transmitted to the monitoring station.
To Silence Alarm:
To silence the bell or siren, press the [#] key. If the alarm is silenced and the smoke detector is not reset, the alarm will resound after 90 seconds.
Resetting Smoke Detectors:
Once the smoke detector is reset, if it still detects smoke, the alarm sequence will resound as described above. If there is no smoke, the system will return to normal.
To reset smoke detectors from an LED Keypad:
Press [*] [7] [2].
To reset smoke detectors from an LCD Keypad:
Press [*] to enter the function list. Scroll to find:
| Press (*) for<> |
|---|
| Output Control |
Press [*] to select the output control. The display will read…
| Select Output<> |
|---|
| Command Output #1 |
Use the arrow (< >) keys to find the following message and press the [*] key to select…
| Select Output<> |
|---|
| Command Output #2 |
Setting The Date & Time
Setting the System Date and Time
To set the system time, enter [*] [6] followed by the Master Code. Press [1]. The keypad will now accept 10 consecutive digits:
- Enter the Time in Hours and Minutes using the 24 Hour format (00:00 to 23:59)
- Enter the Date in Months, Days and Years (MM DD YY).
NOTE: If you have an LCD keypad, your installer may have programmed your system to display the time and date while the keypad is idle.
If this is the case, you may have to press the [#] key to clear the date and time before entering an access code to arm the system, or before performing any other keypad function.
Test Mode Functions
Testing Your System
The Alarm Test provides a two second test of the keypad sounder and bell or siren. Begin with the panel in the Ready state. We recommend that you test your system weekly. Should the system fail to function properly, call your installation company immediately for service.
From an LED keypad:
Enter [*] [6] [Master Code] [4]
Observe the zone light turn ON when the zone is activated. The zone light will turn OFF when the system restores to normal (i.e. door or window closed).
Press [#] to return to the Ready state.
From an LCD keypad:
· Press [*] to enter the functions list. Use the arrow (< >) keys to scroll to find “User Functions” and press [*] to select.
· Enter your [Master Code] and scroll to find the following message…
| Select Option<> |
|---|
| System Test |
Press [*] to perform an Alarm Test. The keypad will display the following message…
| System Test |
|---|
| In Progress |
The following message will be displayed when each zone is activated…
| Secure System |
|---|
| Before Arming<> |
Use the arrow (< >) keys to view which zone is open. This message will disappear when the zone is restored.
If the panel has any fire zones, activation will cause the alarm signal to sound in a pulsed mode.
When testing is complete, call and advise the monitoring station. Should the system fail to function properly, contact your installer.
NOTE: Some features described above will not be functional unless enabled by your installer.
Press [#] to return to the Ready state.
Trouble Messages
Viewing Trouble Conditions:
The control panel continuously monitors a number of possible trouble conditions. If one of these trouble conditions occurs, the keypad will beep twice every 10 seconds until you press any key on the keypad.
To view troubles from an LED Keypad:
A trouble will be indicated by the Trouble light (or System light on a PC1555RKZ keypad) which will remain ON until the trouble condition is cleared. If you cannot determine the cause of the trouble condition, contact your installer for assistance.
To view the type of trouble condition, press [*][2]. One or more zone lights will turn ON, indicating the various trouble conditions:
| ZONE LIGHT | TYPE OF TROUBLE |
|---|---|
| 1 ………. | Service required. Call your installation company for service. |
| 2 ………. | Indicates the loss of AC power. When this trouble occurs, the Trouble (or System) light will turn ON but keypad buzzer will not sound. |
| 3 ………. | Telephone line trouble. |
| 4 ………. | The panel has failed to communicate with the central station |
| 5 ………. | Zone fault. Press [5] and the zone light(s) corresponding to the faulted zones will turn ON. |
| 6 ………. | Zone tamper. Press [6] and the zone light(s) corresponding to the tampered zones will turn ON. |
| 7 ………. | Low zone battery. This trouble is generated when a wireless device exhibits a low battery condition. Press [7] one, two, or three times to view which devices are experiencing battery failure. The following will occur (refer to table below):: |
| 8 ………. | Loss of time on system clock. |
| Keypad beeps: | Keypad displays: | |
|---|---|---|
| Press [7] | 1 | Zones with low batteries (LED keypad – zone lights 1 to 8) |
| Press [7] again | 2 | Handheld keypads with low batteries (LED keypad – zone lights 1 to 4) |
| Press [7] again | 3 | Wireless keys with low batteries (LED keypad – zone lights 1 to 8). To view the battery conditions of wireless keys 9 through 16, you must be at an LCD keypad. |
To view troubles from an LCD Keypad:
From the Ready state, use the arrow (< >) keys to scroll to the following message.
| System Trouble |
|---|
| (*2) to View<> |
Press [*] [2] key to view the trouble. The message will read…
| View Trouble<> |
|---|
| “Trouble Message” |
Use the arrow (< >) keys to view which troubles are present on the system. Once you have scrolled through the list of troubles, press the [#] key to exit the Trouble Viewing mode and return to the Ready state.
Display Lights (All Keypads)
Ready Light:
If the Ready light is ON, the system is ready for arming. The system cannot be armed unless the Ready light is ON.
Armed Light:
If the Armed light is ON, the system has been armed successfully.
Trouble or System Light:
If the Trouble light is ON, one or more zones in trouble condition.
Memory Light:
Upon disarming, if an alarm has occurred while the system was armed, the Memory light will turn ON.
Bypass Light:
If the Bypass light is ON, one or more zones are bypassed.
Fire Light:
If the Fire light is ON, a fire alarm has occurred.
Program Light:
The Program light will flash when you are programming access codes, or performing other programming functions. If someone is programming at another keypad, the Program light will turn ON to indicate that the system is busy.