


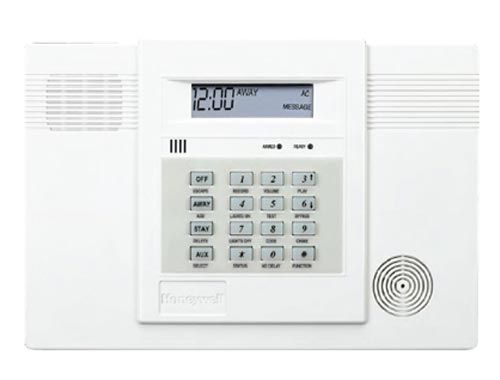
Lynx
ADT's self help desk allows you to troubleshoot your alarm system. Find out how to use your Lynx system, different features and controls.


Downloads
Instructions
Cheat Sheet
- Check System Status: Press the [STATUS] Button
- STAY Mode Arming: Press [CODE] + [*] + [STAY]
- AWAY Mode Arming : Press [CODE] + [*] + [AWAY]
- Disarming: Press [CODE] + [OFF]
- Bypass Zones: Press [CODE] + [BYPASS] + Zone Number
- Must be 2 Digits e.g. Zone 2 is [0][2]
- Chime Mode: Press [FUNCTION] + [CHIME] to turn on/off
- Reset Fire Alarm: Press [CODE] + [OFF] to silence alarm. Press [CODE] + [OFF] again to clear the alarm display.


FAQs
Do you still have questions?
Alarm Memory
If an alarm occurs, the keypad displays the zone number(s) that caused the alarm and the type of alarm (e.g., FIRE ALARM). These messages remain displayed until cleared by a user.
To clear the display: Note the zone number displayed and enter an OFF sequence
Enter your [User Code] and press the [OFF] key
If the READY light is blinking, go to the displayed zone and correct the fault (close windows, etc.).
If the fault cannot be corrected, notify your alarm company.
Arming the System
Arming in Stay Mode
Use this mode when you are staying home, but expect someone to use the entrance door later. Close all protected perimeter windows and doors before arming. The green READY indicator on the keypad should be lit if the system is ready to be armed.
To Arm in STAY Mode:
Your [User code] + [STAY] OR press and hold [STAY]
The keypad beeps three times and displays the armed STAY message. The red ARMED indicator lights and the system announces “armed STAY–exit now.” When armed in STAY mode, the system will sound an alarm if a protected door or window is opened, but you may otherwise move freely throughout the premises. Late arrivals can enter through the entrance door without causing an alarm, but they must disarm the system within the entry delay period or an alarm will occur.
To Restart Exit Delay while System is Armed in STAY mode:
Press [STAY] key
Ask your installer if this feature is active for your system. If active, you can restart the exit delay at any time after arming in STAY mode. This is useful if you wish to open the entry/exit door to let someone in after arming the system, and avoids having to disarm the system and then re-arm it again.
Arming In Away Mode
Use this mode when no one will be staying on the premises. Close all protected perimeter windows and doors before arming. The green READY indicator on the keypad should be lit if the system is ready to be armed.
To Arm in AWAY Mode:
Your [User code] + [AWAY] OR press and hold [AWAY]
The keypad beeps twice, or beeps continuously if exit warning has been programmed for your system, and displays the armed AWAY message.
The red ARMED indicator lights and the system announces “armed AWAY–exit now.” When armed in AWAY mode, the system will sound an alarm if a protected door or window is opened, or if any movement is detected inside the premises.
You may leave through the entrance door during the exit delay period without causing an alarm. You may also re-enter through the entrance door, but you must disarm the system within the entry delay period or an alarm will occur.
Arming the System With No Delay
Use NO DELAY with STAY mode when you are staying home and do not expect anyone to use the entrance door.
Use NO DELAY with AWAY mode when the premises will be vacant for extended periods of time such as vacations, etc. When armed with NO DELAY, the system will sound an alarm if a protected door or window is opened, including the entrance door.
You may leave through the entrance door during the exit delay period without causing an alarm, but an alarm will sound as soon as someone re-enters.
To Arm with NO DELAY:
Your [User code] + [AWAY] or [STAY] + [NO DELAY]
Quick Arming
If Quick Arm was programmed by the installer, you do not need to enter the security code to arm the system. Instead, simply press and hold down the desired arming key for at least 2 seconds. The security code must always be used to disarm the system, however.
To Arm if Quick Arm is Active:
[AWAY] or [STAY] hold down for at least 2 seconds.
To Arm with NO DELAY if Quick Arm is Active:
[AWAY] or [STAY] then [NO DELAY] hold down for at least 2 seconds
IMPORTANT: The Babysitter Code and Installer Code cannot disarm the system unless it was used to arm the system. In addition, if the system is armed by pressing and holding the Quick-Arm buttons, neither the Babysitter Code nor Installer Code can disarm the system.
Disarming the System
Use the [OFF] key to disarm the system and to silence alarm and trouble sounds.
To Disarm the System and Silence Burglary Alarms: Your [User code] + [OFF]
The READY light will light (if no alarms have occurred while armed) and the keypad will beep once to confirm that the system is disarmed.
Door Chime Feature
Your system can be set to alert you to the opening of a door or window while it is disarmed by using CHIME mode. When activated, three beeps will sound at the keypad whenever a protected perimeter door is opened and the zone voice descriptor will be announced. Pressing the [STATUS] key will display the open protection points. Note that the Chime mode can be turned on only when the system is disarmed.
To Turn Chime Mode On or Off:
[FUNCTION] + [CHIME]
The “CHIME” message displays while Chime mode is on, and disappears from the display when Chime mode is off
Fire Alarm Reset
Silencing a Fire Alarm:
Silence the alarm by pressing the [User code] + [OFF] key.
To clear the alarm display, enter your [User code] and press the [OFF] key again.
If the keypad indicates a trouble condition after the second OFF sequence, check that smoke detectors are not responding to smoke- or heat-producing objects in their vicinity. Should this be the case, eliminate the source of heat or smoke.
If this does not remedy the problem, there may still be smoke in the detector. Clear it by fanning the detector for about 30 seconds.
When the problem has been corrected, clear the display by entering your [User code] and pressing the [OFF] key.
Function Keys
Your system may have been programmed to use special keys to manually activate panic functions. The functions that might be programmed are listed below. See your installer for the function(s) that may have been programmed for your system. Your installer should note the functions that are active in your system.
Active Panic Functions:
| Keys | Zone |
|---|---|
| [1] and [*] | 95 |
| [3] and [#] | 96 |
| [*] and [#] | 99 |
To use a paired key panic function, simply press both keys of the assigned pair at the same time. If your keypad has lettered keys for panic functions, press the designated key and hold down for at least 2 seconds to activate the panic function.
Types of Panic Alarms
A Silent Emergency:
Sends an alarm signal to the alarm monitoring company, but there will be no audible alarms or visual displays.
An Audible Emergency:
Sends an emergency message to the alarm monitoring company and sounds a loud, steady alarm at your keypad and at any external sounders that may be connected (ALARM plus a zone number are also displayed).
A Personal Emergency:
Sends an emergency message to the alarm monitoring company and sounds at keypads, but not at external sounders. (ALARM plus a zone number are also displayed).
A Fire Alarm:
Sends a fire alarm message to the alarm monitoring company and uniquely activates keypad and any external sounders (FIRE ALARM plus a zone number are also displayed).
Setting The Date and Time
Your system can display the current time (see your installer). The date is not displayed,but has an internal function. The system must be disarmed with no faults present.
To set the time and date:
[Master Code] or [Installer Code] + [FUNCTION] + [63]
NOTES:
The keypad beeps twice for invalid data entries (e.g., an hour greater than 12), and the entry will not be accepted. The keypad beeps once for valid entries.
Clock-Setting mode automatically ends if no keys are pressed for one minute.
Daylight savings time may have been programmed to automatically begin and end.
| Hour 12=A | (The current hour will be displayed with the AM/PM indication.) |
|---|---|
| Enter the 2-digit hour (i.e., 01-12). | |
| Press [*] to accept the entry and continue to the AM/PM selection. | |
| Press [#] to exit Clock-Setting mode (keypad beeps 4 times). | |
| AM/PM 12=P | (The current AM/PM setting will display A or P.) |
| Enter 1 for PM or 0 for AM. | |
| Press [*] to accept the entry and continue to the minute selection. | |
| Press [#] to return to AM/PM setting. | |
| Minute =25 | The current minute will display. |
| Enter the 2-digit minute (i.e., 00-59). | |
| Press [*] to accept the entry and continue to the month selection. | |
| Press [#] to return to AM/PM setting. | |
| Month =07 | (The current month will display.) |
| Enter the 2-digit month designation (i.e., 01-12). | |
| Press [*] to accept the entry and continue to the day selection. | |
| Press [#] to return to the minute setting. | |
| Day =16 | (The current day of the month will display.) |
| Enter the 2-digit day of the month (i.e., 01-31). | |
| Press [*] to accept the entry and continue to the year setting. | |
| Press [#] to return to the month setting. | |
| Year =03 | The current year will display. |
| Enter the last two digits of the year (i.e., 00-99). | |
| Press [*] to accept the entry and exit Clock-Setting mode (keypad beeps 4 times). | |
| Press [#] to return to the day setting. |
Test Mode
The TEST key puts your system into the Test mode, which allows each protection point to be checked for proper operation. The keypad sounds a single beep every 45 seconds as a reminder that the system is in the Test mode.
Note: An alarm message will not be sent to your alarm monitoring company during the following tests.
Disarm the system and close all protected windows, doors, etc. The “READY” message should be displayed and the green READY indicator (if present on the keypad) should also be lit.
Entering Test Mode:
Enter the [User code] then press [TEST] Key
All LCD segments will light for 3 seconds.
The external sounder should sound for 2 seconds and then turn off. If the sounder does not sound, notify your service company.
Open each protected door and window in turn and listen for three beeps from the keypad. Identification of each faulted protection point should appear on the display. The display will clear when the door or window is closed.
Walk in front of any interior motion detectors (if used) and listen for three beeps. The identification of the detector should appear on the display when it is activated, and its voice descriptor will be announced (if programmed). The display will clear when no motion is detected. Note that if wireless motion detectors are used, there is a 3-minute delay between activations. This is to conserve battery life. To test all smoke detectors, follow the manufacturer’s instructions. The identification of each detector should appear on the display when each is activated. If a problem is experienced with any protection point (no confirming sounds, no display), notify your service company.
When all protection points have been checked and are intact (closed), there should be no zone identification numbers displayed on the keypad.
Exit Test Mode:
When testing is completed, exit the TEST mode by entering your [User code] and pressing the [OFF] key.
If the Test mode is inadvertently left active, it automatically turns off after 4 hours.
Trouble Messages
System Status
Before arming your system, all protected doors, windows, and other protection zones must be closed or bypassed (see the BYPASSING PROTECTION section). Pressing the [STATUS] key will announce all zones that are faulted, as well as any other abnormal system condition, making it easier for you to secure any open zones.
Press the STATUS Key:
Press the [STATUS] key once to announce the general status of the system. The following phrases may be heard depending on the current state of the system:
disarmed, ready to arm “message” “check system”
disarmed, “not ready to arm”, “message”
armed, “away” “stay” “instant” “check system” “message”
NOTE: Phrases are variable, and are announced only if appropriate in the current state of the system
Press the [STATUS] key twice to announce specific system status.
NOTE: second press must be within 5 seconds of first press. The following phrases may be heard depending on the current state of the system:
- fire alarm “zone voice descriptors”
- alarm “zone voice descriptors”
- fire fault “zone voice descriptors”
- fault “zone voice descriptors”
- low battery “zone voice descriptor”
- system low battery
- check system
- AC loss
- zones bypassed
- chime
About the Display and Indicators
| Display | Definitions |
|---|---|
| ALARM: | Appears when an intrusion has been detected and the system is armed (also appears during a fire alarm or audible emergency alarm). Accompanied by the protection zone in alarm. |
| AWAY: | All burglary zones, interior and perimeter, are armed. INSTANT: Entry delay is turned off. STAY: Perimeter burglary zones, such as protected windows and doors, are armed. |
| FIRE: | Appears when a fire alarm or fire fault is present. Accompanied by a display of the zone in alarm. |
| LOW BAT: | Low battery condition in a wireless sensor (if zone number is displayed) or low system battery (if no zone number is displayed). If 00 is displayed, a wireless keypad (5827/5827BD) has a low battery condition. |
| AC: | Appears when AC power is present. If not lit, the system is operating on backup battery power. |
| CHIME: | Appears when the Chime feature is activated. |
| TEST: | Appears when the system is in Test mode. |
| REC: | Appears when in Recording mode. |
| MESSAGE: | Appears when a message has been recorded and has not yet been played back. |
| BYPASS: | One or more burglary protection zones have been bypassed. |
| FAULT: | Appears when a malfunction is discovered in the system at any time; or if an open is detected in a fire zone at any time; or when a fault in a day/night burglary zone is discovered during a disarmed period. Accompanied by a display of the zone number in trouble. |
| LED | Definitions |
|---|---|
| ARMED LED: | ON = System armed (Red) OFF = System disarmed Blinking = System armed, but a fault exists |
| READY LED: | ON = System disarmed, ready to arm (Green) Blinking = System disarmed, not ready to arm (a fault exists) OFF = System armed |
Typical Trouble Condition Displays
To silence the beeping sound for fault conditions, press any key.
| FAULT | Indicates that a problem exists with the zone(s) displayed, accompanied by rapid beeping. First, determine if the zone(s) displayed are intact and make them so if they are not. If the zone uses a wireless detector, check that changes in the room (moving furniture, televisions, etc.) are not blocking wireless signals from the detector. If the problem has been corrected, the zone descriptor (s) and FAULT should disappear from the display. If not, key an OFF sequence [User code] plus [OFF] to clear the display. A fault condition can also indicate a wiring problem. If the “FAULT” display persists, notify your service company. Note that the system will not allow arming if a fault condition exists. To arm the system with a fault condition present, you must first bypass the zone(s) having the fault condition. |
|---|---|
| FC | Indicates that a failure has occurred in the telephone communication portion of your system or a problem with the phone line existed when dialling was attempted. |
| CC | Indicates that the control is on-line with the central station’s remote computer. The control will not operate while on-line. Wait a few minutes. The display should disappear. |
| dl | If this remains displayed for more than 1 minute, the system is disabled. |
| CA | Indicates a cancelled alarm. EA Indicates an exit alarm. |
| 90 | Indicates that the system has detected an RF jam condition or excessive interference. If the condition persists, notify your service company. |
| LOW BAT (no zone no.) | Accompanied by a once-per 45 seconds beeping at the keypad, indicates a low system battery condition exists. Refer to the procedure on the next page to replace the system battery. |
| LOW BAT (with zone no.) | Accompanied by a once-per-45 seconds beeping at the keypad, indicates a low battery condition exists in the wireless transmitter displayed |
| LOW BAT (with zone 00) | Accompanied by a once-per-45 seconds beeping at the keypad, indicates a low battery condition exists in a wireless keypad. |
User Code Change
For additional security, users other than you who do not need to know your code can be assigned different security codes. These secondary users are identified by “user numbers” when their codes are assigned. You can assign up to 6 user codes (2-digit user numbers 03-08).
Note that the master (primary) user of the system is the only one who can assign codes to secondary users, and is designated user no. 02; user no. 01 is the installer’s code. All codes can be used interchangeably when performing system functions (a system armed with one user’s code can be disarmed by another user’s code), with the exception of the Babysitter Code described below.
Babysitter Code (User 07):
This code can be used to arm the system, but cannot disarm the system unless the system was armed with this code. This code is typically assigned to someone (such as a babysitter) who needs to arm/disarm the system only at certain times. The Babysitter Code is assigned to User 07.
Duress Code (User 08):
This feature is intended for use when you are forced to disarm or arm the system under threat. When used, the system will act normally, but can silently notify the alarm monitoring company of your situation, if that service has been provided. Duress Code is assigned to User 08.
To Add/Delete a User or Change a User’s Code:
Sequential key depressions for all steps in a procedure must be made within 2 seconds of one another, or else the entire entry is aborted and must be repeated from its beginning.
Add/ Change a User code:
[Master Code] + [CODE] Key + [user number (03-08)] + [user code]
Delete a user code:
[Master Code] + [CODE] Key + [user number (03-08)]
Wait (about 3 seconds) until the keypad beeps once before pressing any other key. The code is automatically deleted.
Changing the Master Code:
Follow the procedure for changing a user’s code, but enter User No. 02 and enter the new code twice.
Zone bypassing
Bypassing Individual Zones
Use the [BYPASS] key when you want to arm your system with one or more zones intentionally unprotected. Bypassed zones are unprotected and will not cause an alarm when violated while your system is armed.
All bypasses are removed when an OFF sequence (security code plus OFF) is performed.
Bypasses are also removed if the arming procedure that follows the bypass command is not successful. The system will not allow fire zones to be bypassed. The system must be disarmed first.
To Bypass a Zone(s):
Your [User code] + [BYPASS] + [2-digit zone number (s) for zone (s)] to be bypassed (e.g., 01, 02, 03, etc.)
IMPORTANT: All single-digit zone numbers must be preceded by a zero (for example, enter 01 for zone 1).
The keypad will provide a confirmation beep and display the word “BYPASS” along with each bypassed zone number. Wait for these zones to be displayed, to be sure that intended zones are bypassed. Arm the system as usual when the keypad displays the READY LED on steady.
Quick Bypass:
Your system may allow you to easily bypass all open (faulted) zones without having to enter zone numbers individually. Ask your installer if this feature is active.
To Bypass a Zone (s) using Quick Bypass:
Your [User code] + [BYPASS] + [FUNCTION]
In a few moments, all open zones will be displayed along with the word “BYPASS.” Wait for these zones to be displayed before arming. Arming the system before zones are displayed eliminates all bypasses. Arm the system as usual when the keypad displays the READY LED on steady.
Displaying Bypassed Zones:
The system allows you to determine what zones have been previously bypassed. Bypassed zones can be displayed only when the system is disarmed, and when the “BYPASS” message described above is displayed.
To Display Bypassed Zone (s):
Your [User code] + [BYPASS] + WAIT
In a few moments, all open zones will be sequentially displayed along with the word “BYPASS.”