


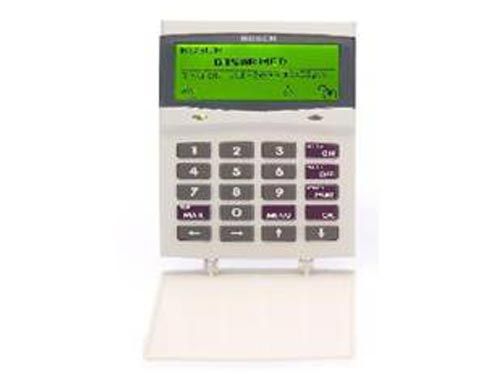
Solution 16+/64/6000


Alarm Memory
History Log – Menu 7-0-2
This menu allows you to review the last 256 history events (from most recent to least recent).
Each event will display:
Line 1 – Displays Event Number – Date / Time – Destination 1 and/or 2 report status (S= Sent, P = Pending, F = Fail, A = Abort and L = Log Only).
Line 2 – Displays the source of the event (eg. zone name and zone number or user name and user number).
Line 3 – Displays the event description.
1. Press [MENU] + [7] + [0] + [2].
The keypad will display the most recent event stored in the history log.
| E001 Mon, 01Oct 03:41 S1L2 |
|---|
| Manual Test Report |
| Press ▲▼ OK or MENU |
2. Use the [↑] and [↓] keys scroll between history events.
3. Press [OK] or [MENU] to exit.
Arming & Disarming The System
Turning An Area All On
Use this function to turn an area All On. The Solution control panel is factory default only for one area. As soon as you turn an area on, exit time will start. Exit time allows you to exit the premises without sounding an alarm. Your security company programs the length of exit delay time.
1. Make sure that all zones are normal (not faulted).
2. Enter your PIN, then press the [ON] key.
If your PIN is valid and if all zones are normal, exit delay time will start. You should leave now. If your Solution control panel detects a faulted zone, you should return it to normal, or bypass the zone.
During exit delay, you may stop the area from turning on by entering your PIN followed by the [OFF] key.
3. To turn the system (or area) off, enter your PIN, then press [OFF].
Turning An Area Part On / Part 2 On
Use this function to turn an area Part On or Part 2 On. The Solution control panel is factory default only for one area. Part On and Part 2 On turns on only part of the area, leaving the rest of the area turned off.
Only the security company can program which zones are monitored for Part On. The master user can program which zones are monitored when a user turns an area Part 2 On.
Once you have turned an area Part On or Part 2 On, exit delay time starts to count down. You should leave all zones that are active before exit delay time expires. Leaving active zones after exit delay expires causes an alarm event. Use Part On or Part 2 On only when you want part of an area turned on.
1. Make sure that all zones are normal (not faulted).
2. Enter your PIN, then press the [PART] key.
If your PIN is valid and if all zones are normal, the keypad will prompt you to select Part On or Part 2 On.
3. Using the arrow keys, highlight Part On or Part 2 On then press [OK].
Exit delay time will start. You should leave now. If your system has a faulted zone, you should return it to normal, or bypass the faulted zone. During exit delay, you may stop the system from turning Part On by entering your PIN followed by the [OFF] key.
4. When exit time has expired, the keypad will display the Part On icon.
5. To turn the system off, enter your PIN, then press [OFF].
Turning The System Off
When the system is on, you must enter through a designated entry door to prevent an alarm. Opening a designated door (e.g. front door) will start entry time. During entry time, the keypad will emit a pulsing tone “beep” to remind you to turn the system off. To turn the area off, enter your PIN followed by the [OFF] key before the entry delay time expires.
If you enter through the wrong door or fail to turn the system off before the entry delay time expires, you may sound an alarm. If an alarm occurs, silence the alarm (by entering your PIN followed by the [OFF] key) and call your security company to let them know that it is not an emergency situation.
1. Enter your PIN + [OFF] to turn the system (or area) off. The keypad will no longer display the ‘Lock’ or ‘Part’ icons.
Silencing Alarms
When the Solution control panel has registered an alarm, the keypad (s) and sirens will sound to alert personnel that an alarm occurred. The keypad will scroll all alarms on the keypad display for visual feedback. If you enter your PIN before the system dials your security company, the alarm report is cancelled (if programmed).
1. Enter your PIN + [OFF] to silence any alarm and turn the system off.
The keypad will continue to scroll all alarm events that caused the alarm. This is called alarm memory.
2. To clear alarm memory, turn the area on and off again (eg. PIN + [ON] + PIN + [OFF]).
Automatic Arming
Your system may have been programmed to automatically arm itself at a certain time of the day.
If for some reason you are still in the building when the auto arming is taking place then it is possible to extend or delay the auto-on time (automatic arming time) by one hour simply by entering your PIN during the auto-on pre-alert time. The auto-on pre-alert time sounds the keypad buzzer to warn you that the system will automatically turn All On, Part On or Part 2 On.
Example:
If the control panel is programmed by your installer to automatically turn All On at 6:00pm and the auto-on pre-alert time starts beeping the keypad at 5:55pm, entering your PIN between 5:55pm and 6:00pm will delay the auto-on time by one hour and the auto-on pre-alert time will again commence at 6:55pm. Therefore the system will automatically turn All On at 7:00pm.
DTMF Quick Arm
If you forget to arm your system it may be possible for you to remotely arm it using a touch tone telephone if the remote arm option has been enabled by your installer.
To arm the system call the number which the panel is connected to and when the panel answer you will here 3 beeps in accending frequency if the panel is in the disarmed condition. Press [0] + [#] to arm. You will hear 3 beeps in decending order when the panel arms.
All areas on the system will be armed regardless of there condition when using the DTMF quick arm function.
Turn Area On/Off – MENU 2-0-1
This menu allows you to turn an area All On or off.
1. Enter [MENU] + [2] + [0] + [1].
A list of different areas will display on the keypad.
| A001 Reception Area |
|---|
| A002 Sales Dept ✓ |
| A003 Administration Dept |
| Press ▲▼ OK or MENU |
If an area has already been turned All On or Part On, a ‘tick’ (✓) will be displayed on the right side of the name description (see A002 Sales Dept above).
2. Use the [↑] and [↓] keys to select the area that you want to turn on or off, then press [OK] to select. Alternatively, you can enter the area number you want to turn on or off, then press [OK].
Turn All Areas On – MENU 2-0-2
This menu allows you to turn on all areas that your PIN has been assigned to at the same time All On. The keypad display below shows the area icons 1 through to 8.
1. Enter [MENU] + [2] + [0] + [2].
The keypad will display the exit time bar to prompt you to exit all areas. You should leave all areas now.
When exit time has expired, the keypad will display that all areas are turned All On (Armed).
Note: Area icons will only display if programmed to do so by your security installer.
Turn All Areas Off – MENU 2-0-3
This menu allows you to turn off all areas that your PIN has been assigned to at the same time. However, this menu requires at least one area that has a keypad assigned to it to be disarmed before you can access this command.
1. Enter [MENU] + [2] + [0] + [3].
Bypassing
Bypass Zones – Menu 3-0-2
This menu allows you to bypass or un-bypass a single or multiple zones before you turn the area All On, Part On or Part 2 On. When bypassing zones, it disables the ability for a zone to detect intrusion and sound an alarm.
A burglary zone will automatically become un-bypassed when you turn the corresponding area off (disarm). Any 24-Hr fire or 24- Hr non fire zones will need to be manually un-bypassed.
1. Enter [MENU] + [3] + [0] + [2].
A list of zones that can be bypassed will display on the keypad. A ‘✓’ displayed on the right side of the zone name indicates that the zone is already bypassed.
| Z001 Zone 1 Name ✓ |
|---|
| Z002 Zone 2 Name |
| Z003 Zone 3 Name |
| Press ▲▼ OK or MENU |
2. Use the [↑] and [↓] keys to select the zone that you want to bypass, then press [OK]. Alternatively, you can enter the zone number that you want to bypass, then press [OK].
If the zone is bypassed, the keypad will prompt:
| Zone 1 Name Z001 is bypassed. To un-bypass, press OFF. |
|---|
| Press OK or MENU |
If the zone is not bypassed, the keypad will prompt:
| Zone 1 Name Z001 is un-bypassed. To bypass, press ON. |
|---|
| Press OK or MENU |
3. Press [ON] or [OFF] to toggle the zone to be bypassed/unbypassed.
4. Press [OK] to save and exit, or press [MENU] to exit without saving.
Repeat steps 1 to 4 to bypass or un-bypass additional zones.
Chime Mode
Chime On/Off – Menu 2-0-5
Chime mode allows you to monitor a zone (or group of zones) to sound the keypad buzzer or activate a programmable output when the corresponding area is turned off (disarmed). This can be useful when you need to monitor the front or back entrance to the premises.
This menu allows a user to turn chime mode on or off. Only keypads programmed to sound the chime tone will be heard when a zone programmed for chime is faulted.
1. Enter [MENU] + [2] + [0] + [5].
A list of different areas will display on the keypad.
| A001 Reception Area ✓ |
|---|
| A002 Sales Dept |
| A003 Administration Dept |
| Press ▲▼ OK or MENU |
2. Use the [↑] and [↓] keys to select the area that you want to turn chime mode on or off, then press [OK] to select. Alternatively, you can enter the area number that you want to turn chime mode on or off, then press [OK].
The keypad will display the following when chime mode is turned off:
| Reception Area A001 Chime Is OFF, To Turn ON, Press ON. |
|---|
| To Go Back Press OK |
The keypad will display the following when chime mode is turned on:
| Reception Area A001 Chime Is ON, To Turn OFF, Press OFF. |
|---|
| To Go Back Press OK |
3. Press the [ON] key to turn chime mode on, or, press [OFF] to turn chime mode off.
4. Press the [OK] key to exit.
Keypad Functions
Press ▲▼ OK or MENUKeypad Status – MENU 6-0-0
The keypad status will display the following information:
Line 1 = Keypad Number
Line 2 = Type of Keypad
Line 3 = Toggle Voltage, Temperature and Area Assignment information.
1. Press [MENU] + [6] + [0] + [0].
| Kp001 Keypad 001 |
|---|
| Kp 002 Keypad 002 ✓ Exit |
| Press ▲▼ OK or MENU |
2. Use the [↑] and [↓] keys to select the keypad that you want to view, then press [OK] to select. Alternatively, you can enter the keypad number, then press [OK]. The location of the keypad you are at is displayed by the (✓ tick).
3. he keypad will display the status of the keypad.
| Keypad 001 K001 Graphic + Prox v001 Volts = 13.87 |
|---|
| Press OK or MENU |
Volume – MENU 6-1-0
This menu allows you to adjust the volume of the keypad’s buzzer. Each keypad will need to have their volume adjusted separately.
1. Press [MENU] + [6] + [1] + [0].
2. Use the [←] and [→] keys or use the [↑] and [↓] keys to increase or decrease the volume of the keypad buzzer until the desired volume has been reached.
3. Press [OK] to save and exit, or press [MENU] to exit without saving.
Contrast – MENU 6-1-1
1. Press [MENU] + [6] + [1] + [1].
2. Use the [←] and [→] keys to adjust the bar until the desired contrast is reached.
3. Press [OK] to save and exit, or press [MENU] to exit without saving.
Backlight – MENU 6-1-2
This menu allows you to adjust the brightness of the keypad’s LCD display backlight. Each keypad can have their display adjusted separately.
1. Press [MENU] + [6] + [1] + [2].
2. Use the [←] and [→] keys to adjust the bar until the desired backlight is reached.
3. Press [OK] to save and exit, or press [MENU] to exit without saving.
Keypad Hi/Lo Temp – MENU 7-7-3
The keypad Hi/Lo temperature allows you to program the minimum (0 °C) and maximum (50 °C) temperatures the keypad will monitor (tolerance = +/- 2 °C).
If the temperature falls below the minimum temperature, the keypad will display ‘Low Temp ‘xx’. If the temperature increases above the maximum temperature, the keypad will display ‘High temp ‘xx’.
(xx = programmed temperature to be monitored).
1. Press [MENU] + [7] + [7] + [3].
The keypad will display the current temperature settings.
| Keypad Hi/Lo Temp |
|---|
| High Temp Low Temp |
| 00 00 |
| Press ◄►▲▼ OK to SAVE |
2. Use the [↑] and [↓] keys to program the ‘High’ and ‘Low’ temperatures. To toggle between the ‘High’ and ‘Low’ temperature, use the [←] and [→] keys (Range = 0°C to 50°C).
3. Press [OK] to save and exit, or press [MENU] to exit without saving.
Reset Smoke Alarm
Smoke Sensor Reset – Menu 3-0-5
This menu allows you to reset smoke sensors.
1. Enter Programming Mode by pressing PIN+MENU
2. Enter [MENU] + [3] + [0] + [5].
A list of different areas will display on the keypad.
3. Use the [↑] and [↓] keys to select the area that you want
to reset the smoke detectors, then press [OK] to select.
Alternatively, you can enter the area number, then press
[OK].
The keypad will display the following:
| Smoke detector reset in |
|---|
| Progress. Please wait |
4. The keypad will automatically return to the menu when all smoke detectors in the area has been reset.
Schedules
Schedule Name – MENU 7-5-0
1. Enter [MENU] + [7] + [5] + [0].
A list of schedules will display on the keypad.
| Sk001 Schedule 1 Name |
|---|
| Sk002 Schedule 2 Name |
| Sk003 Schedule 3 Name |
| Press ▲▼ OK or MENU |
Use the [↑] and [↓] keys to select the schedule name that you want to change, then press [OK] to select. Alternatively, you can enter the schedule number, then press [OK].
The keypad will display the following:
| Name S001 |
|---|
| Schedule 1 Name |
| Press ◄►▲▼ OK to SAVE |
To program the schedule name, use the [←] and [→] keys to scroll the cursor left and right across the user name text. Use the [↑] and [↓] keys to scroll through the different characters available. To clear all text from the cursor position to the right, press the [OFF] key.
4. Press [OK] to save and exit, or press [MENU] to exit without saving.
Schedule Time – MENU 7-5-1
1. Enter [MENU] + [7] + [6] + [2].
A list of schedules will display on the keypad.
| Sk001 Schedule 1 Name |
|---|
| Sk002 Schedule 2 Name |
| Sk003 Schedule 3 Name |
| Press ▲▼ OK or MENU |
Use the [↑] and [↓] keys to select the schedule that you want to change, then press [OK] to select. Alternatively, you can enter the schedule number, then press [OK].
The keypad will display the following:
| Sk001 Schedule 1 Name |
|---|
| Start Time: 00:00 |
| Stop Time: 00:00 |
| Press 0-9 OK to SAVE |
3. Enter the new start and stop times in 24-hour format (00:00 to 23:59 hours).
4. Press [OK] to save and exit, or press [MENU] to exit without saving.
Day – MENU 7-5-2
This menu programs which days of the week the timer execute function will operate. To toggle the day of the week on/off, press the corresponding number on the keypad (e.g. to turn Monday on, press [2] + [OK], to toggle Monday off, press [2] + [OK] ).
1. Enter [MENU] + [7] + [5] + [2].
A list of schedules will display on the keypad.
| Sk001 Schedule 1 Name |
|---|
| Sk002 Schedule 2 Name |
| Sk003 Schedule 3 Name |
| Press ▲▼ OK or MENU |
2. Use the [↑] and [↓] keys to select the schedule that you want to change, then press [OK] to select. Alternatively, you can enter the schedule number, then press [OK].
The keypad will display the following:
| Day Sk001 | |||||||
|---|---|---|---|---|---|---|---|
| S | M | T | W | T | F | S | Hol |
| Y | Y | Y | Y | Y | Y | Y | N |
| Press 1-8 OK to SAVE |
3. Press [1] to [8] to enable/disable the days of the week that the schedule will operate.
4. Press [OK] to save and exit, or press [MENU] to exit without saving.
Schedule Holiday Name – MENU 7-6-0
This menu allows you to program 16 characters for the holiday name.
1. Enter [MENU] + [7] + [0] + [6].
A list of holiday names will display on the keypad.
2. Use the [↑] and [↓] keys to select the timer name that you want to change, then press [OK] to select. Alternatively, you can enter the timer number, then press [OK].
The keypad will display the following:
| Name S001 |
|---|
| Holiday 1 Name |
| Press ◄►▲▼ OK to SAVE |
3. To program the holiday name, use the [←] and [→] keys to scroll the cursor left and right across the user name text. Use the [↑] and [↓] keys to scroll through the different characters available. To clear all text from the cursor position to the right, press the [OFF] key.
4. Press [OK] to save and exit, or press [MENU] to exit without saving.
Start / Stop Day – MENU 7-6-1
This menu allows you to program the start date and the stop date of each holiday period.
1. Enter [MENU] + [7] + [6] + [1].
A list of holiday names will display on the keypad.
2. Use the [↑] and [↓] keys to select the holiday that you want to change, then press [OK] to select. Alternatively, you can enter the holiday number, then press [OK].
The keypad will display the holiday start date:
| Holiday Dates H001 | |
|---|---|
| Start Date | Stop Date |
| 01 Jan | 01 Jan |
| Press ◄►▲▼ OK to SAVE |
3. To program the holiday start date and stop date, use the [↑] and [↓] keys to scroll the cursor left and right between the holiday day and month. Use the [←] and [→] keys to scroll the day and month.
4. Press [OK] to save and exit, or press [MENU] to exit without saving.
Set Date & Time
Set Date & Time – Menu 7-1-0
This menu allows you to program/adjust the date and time in the Solution control panel.
1. Press [MENU] + [7] + [1] + [0].
The keypad will display the current date and time.
| Set Date And Time |
|---|
| 01-Jan-2004 04:37am |
| Press ◄►▲▼ OK to Save |
2. Use the [↑] and [↓] keys to program the month, day, year, hour and minute. Use [←] and [→] keys to scroll cursor left and right to between the month, day, year, hour and minute.
3. Press [OK] to save and exit, or press [MENU] to exit without saving.
Test Mode
Walk Test All Zones – MENU 3-9-0
This menu allows you to test all zones within an area at the same time. To successfully walk test each zone, you must open and close each zone.
1. Press [MENU] + [3] + [9] + [0]. The keypad will display a list of areas that are available to walk test zones.
2. Use the [↑] and [↓] keys to select the area that you want to do walk test, then press [OK] to select. Alternatively, you can enter the area number, then press [OK].
The keypad will scroll all zones that you can test.
| To Test Z001 open/close |
|---|
| Zone 1 |
| Press OK or MENU |
| To Test Z002 open/close |
|---|
| Zone 2 |
| Press OK or MENU |
3. Open and close each zone that needs to be tested. A zone that has been successfully tested will no longer scroll on the keypad display.
When all zones have been tested, the keypad will display:
| Selected zones have been |
|---|
| Tested OK |
| Press OK or MENU |
4. Press [OK] to save and exit, or press [MENU] to exit without saving.
Walk Test A Single Zone – MENU 3-9-1
This menu allows you to select a single zone to be tested via walk test.
1. Press [MENU] + [3] + [9] + [1]. The keypad will display a list of zones that are available to be tested via walk test.
2. Use the [↑] and [↓] keys to select the zone that you want to walk test, then press [OK] to select. Alternatively, you can enter the zone number, then press [OK].
The keypad will display the zone to be tested.
| To test Z001 open/close |
|---|
| Zone 1 Name |
| Press OK or MENU MENU |
3. Open and close the zone that needs to be tested.
When the zone has been successfully faulted and restored, the keypad will display:
| Z001 Zone 1 Name |
|---|
| Test Successful |
| Press OK or MENU MENU |
Press [OK] to save and exit, or press [MENU] to exit without saving.
External Siren Test – Menu 4-9-0
This menu allows you to test any external sirens which have been connected by your installer. The test will last for 5 seconds.
1. Enter [MENU] + [4] + [9] + [0].
If the system has been partitioned, the keypad will display a list of areas.
| A001 Area 1 Name |
|---|
| A002 Area 2 Name |
| A003 Area 3 Name |
| Press ▲▼ OK or MENU |
Use the [↑] and [↓] keys to select the area that you want to test the siren, then press [OK]. Alternatively, you can enter the area number, then press [OK].
The keypad will display the following during the siren test.
| External Audible |
|---|
| Testing Press any key to abort |
| Press OK or MENU |
When the siren test is complete, the keypad will display the following:
| Testing Complete. Press OK to continue |
|---|
| Press OK or MENU |
3. Press [OK] to exit.
Internal Siren Test – Menu 4-9-1
This menu allows you to test any internal sirens which have been connected by your installer. The test will last for 5 seconds.
1. Enter [MENU] + [4] + [9] + [1].
If the system has been partitioned, the keypad will display a list of areas.
| A001 Area 1 Name |
|---|
| A002 Area 2 Name |
| A003 Area 3 Name |
| Press ▲▼ OK or MENU |
2. Use the [↑] and [↓] keys to select the area that you want to test the bell, then press [OK]. Alternatively, you can enter the area number, then press [OK].
The keypad will display the following during the bell test.
| Internal Audible Testing Press any key to abort |
|---|
| Press OK or MENU |
When the bell test is complete, the keypad will display the following:
| Testing Complete. Press OK to continue |
|---|
| Press OK or MENU |
Press [OK] to exit.
Strobe Test – Menu 4-9-2
1. Enter [MENU] + [4] + [9] + [2].
If the system has been partitioned, the keypad will display a list of areas.
| A001 Area 1 Name |
|---|
| A002 Area 2 Name |
| A003 Area 3 Name |
| Press ▲▼ OK or MENU |
Use the [↑] and [&8595;] keys to select the area that you want to test the strobe, then press [OK]. Alternatively, you can enter the area number, then press[OK]. The keypad will display the following during the strobe test.
| Strobe Activated. Will Reset On exit |
|---|
| Press OK or MENU |
Check and verify that the strobe light is on.
3. Press [OK] to exit.
Send Test Report – Menu 5-9-0
This menu allows you to test the reporting functions of the Solution control panel by manually sending a ‘Test’ report to the receiving party (i.e. security company monitoring station, mobile telephone etc).
1. Enter [MENU] + [5] + [9] + [0].
The keypad will prompt that it is in the process of sending a test report.
| Comms testing in progress. Please wait. . |
|---|
| To Go Back Press OK |
If the test is successful, the keypad will prompt:
| Communications Test |
|---|
| Successful |
If the test is NOT successful, the keypad will prompt:
| Test Report Failed |
|---|
| Please call for service Press OK or MENU |
2. Press [OK] or [MENU] to exit.
Battery Test – Menu 7-9-1
This menu allows you to manually test the systems back up battery. The Solution 64 will automatically test the battery once per day and every time the system is armed.
The battery test can take up to two minutes to complete and the keypad will display the voltage of the battery during the test.
1. Press [MENU] + [7] + [9] + [2].
The keypad will display the battery voltage whilst under test:
| Battery test in progress. Please wait. . |
|---|
| Voltage = 13.4V |
| To Go Back Press OK |
If the battery has passed the test, the keypad will display:
| Battery test Passed. |
|---|
| Press OK to continue |
If the battery has failed the test, the keypad will display:
| Battery test Failed. |
|---|
| Please Call for Service. |
| Press OK to continue |
2. Press [OK] to exit.
Trouble Conditions
System Trouble – Menu 7-0-1
The System Trouble Menu displays all current system troubles in a list format. Some trouble events require you to drill down and non-system trouble that are curent within the Solution control panel.
1. Press [MENU] + [7] + [0] + [1].
The keypad will display a list of all current system and non system trouble conditions.
To determine the system trouble condition, highlight the panel number (P001 to P002) that you want to view using the [↑] and [↓] keys, then press [OK] to select.
| P001 System Trouble |
|---|
| Z001 Zone 1 Name |
| Z002 Zone 2 Name |
| Press ▲▼ OK or MENU |
To determine the non system (zone) trouble condition, highlight the zone number Z001 to Z064) that you want to view using the [↑] and [↓] keys, then press [OK] to select.
| P001 System Trouble |
|---|
| Z001 Zone 1 Name |
| Z001 Zone 2 Name |
| Press ▲▼ OK or MENU |
2. If viewing system trouble conditions, the keypad will display similar to the following:
| Panel 001 P001 |
|---|
| Voltage= 13.9V Temp=36 |
| Date And Time |
| Press ▲▼ OK or MENU |
The third line of the keypad display scrolls between all current system trouble events.
If viewing non-system trouble conditions, the keypad will display similar to the following:
| Zone 1 Name Z001 |
|---|
| EOL = Open |
| Press ▲▼ OK or MENU |
3. Press [OK] or [MENU] to exit the system trouble menu command:
If there are no system troubles, the keypad will display:
| There are no System troubles. |
|---|
| Press ▲▼ OK or MENU |
Refer to the Trouble Messages table for a complete list of trouble events and their meanings.
User Code Changes
| Trouble Condition | Description |
|---|---|
| Mains Missing | The system has detected that the AC mains supply has failed or is disconnected. If there is not a general power outagein your area then you should contact your security company. |
| Battery Low | The backup battery has failed the periodic test which the system performs on a regular basis. You should contact your security company as the battery may need replacing. |
| Battery Missing | The system has detected that its backup battery has been disconnected. |
| Battery Reversed | The system has detected that backup battery has not been connected correctly. You should contact your security company. |
| Voltage Low | The voltage reading the keypad has fallen below the minimum programmed by the security company. |
| Voltage High | The voltage reading at the keypad has increased above the maximum programmed by the security company. |
| RF Rxer Missing | The system has detected that the RF receiver is disconnected. |
| RF Rxer Tamper | The system has detected that the tamper circuit on the RF receiver is faulted. |
| RF Rxer Jammed | The system has registered a jamming fault from the RF receiver. This situation may preven certain parts of your system from working correctly. You should contact your security company. |
| Comms Trouble R1 | The system has failed to send reports to the primary report contact. You should contact your security company. |
| Comms Trouble R2 | The system has failed to send reports to the secondary report contact. You should contact your security company. |
| Comms Test Fail | The system has failed to send its periodic report to the monitoring station. You should contact your security company. |
| Buss Trouble | The system has failed to communicate to a system device (e.g. keypad etc). |
| Default PIN Trbl | The system has detected that either the Installer PIN or User 1 PIN has not been changed from the factory default codes. These codes should be changed immediately to prevent a security risk. |
| Date And Time | The system date and time needs to be set. |
| Cabinet Tamper | The system has detected that someone has tampered with its metal enclosure or that it has been forced open. Inspect and contact your security company if necessary. |
| Siren Trouble | The system has detected that the external siren has failed or has been disconnected from the system. |
| Telco Line Trouble | The system has detected that its telephone line has been disconnected for a minimum of 30 seconds. |
| LAN Overload | The system has detected that the current load has exceeded the maximum LAN rating. You should contact your security company. |
| Comm+ Overload | The system has detected that the current load has exceeded it’s maximum COMM+ rating. You should contact your security company. |
| Accessory Overld | The system has detected that the current load has exceeded it’s maximum ACCS+ rating. You should contact your security company. |
| Time For Service | The system displays this trouble condition to remind you that a service call is due. |
| Memory Fault | The system has detected an error with its internal memory. You should contact your security company. |
| Default Memory | The system memory has reset to factory default. You should contact your security company. |
| Service Mode | The security installer has entered service mode. |
| Phone In Use | The system is using the phone line. |
| Enter New PIN for DEBBIE SMITH U002 |
|---|
| Press OK or MENU |
3. Enter your new PIN, and then press [OK]. If an error tone sounds, try a different PIN. The keypad will now prompt you to enter your new PIN again.
| Confirm New PIN for DEBBIE SMITH U002 |
|---|
| Press OK or MENU |
4. Enter your new PIN again.
5. Press [OK] to save and exit, or press [MENU] to exit without saving Your PIN has now been changed.
Programming Text Using The Keypad
When programming text via the keypad, various keys on the keypad operate differently.
A group of characters is assigned to each of the numeric keys on the keypad. Pressing the same numeric key again will toggle to the next character assigned to the key (eg. Press the [2] key will display the ‘A’ character, press the [2] key again will toggle to the ‘B’ character, press the [2] key again will toggle to the ‘C’ character etc).
Once the correct character is display use the arrow keys to move to the next letter of the word you are entering.
The key assignments are identical to those found on most fixed and mobile phones.
When programming text, each numeric key represents a different group of characters.
Pressing the same numeric key repeatedly will step you through the available characters assigned to the key. The text key layout is the same as most phones. Refer to the table below for detailed character information.
Refer to the table below for more information.
| Key | Characters Assigned To Each Numeric Key | ||||||||
|---|---|---|---|---|---|---|---|---|---|
| 1 | . | , | > | ! | – | & | ‘ | ‘ | |
| 2 | A | B | C | a | b | c | 2 | ||
| 3 | D | E | F | d | e | f | 3 | ||
| 4 | G | H | I | g | h | i | 4 | ||
| 5 | J | K | L | j | k | l | 5 | ||
| 6 | M | N | O | m | n | o | 6 | ||
| 7 | P | Q | R | S | p | q | r | s | 7 |
| 8 | T | U | V | t | u | v | 8 | ||
| 9 | W | X | Y | Z | w | x | y | z | 9 |
| 0 | SPACE | 0 | |||||||
| ↑ | Scroll Up through entire character list | ||||||||
| ↓ | Scroll Down through entire character list | ||||||||
| ← | Move to left one character position | ||||||||
| → | Move to right one character position | ||||||||
| OFF | Clear from cursor position to end of line |
Once the desired character is displayed press the right arrow key to move to the next character position. To save programming changes, press [OK], or press [MENU] to exit without saving.
The following additional special characters are available by scrolling using the up and down arrow keys.
+ – @ # $ “ & % * : ( ) / < > =
Change Other PIN – MENU 1-1-1
If you have a master PIN, this command allows you to change somebody else’s PIN. It is recommended that you write down the old PIN and the new one before you begin. Once the change is complete you should destroy the written copy. The new PIN must have the same number of digits as the old PIN.
At factory default, each PIN is fixed to 4 digits in length. The default PIN for User 1 (Master user) is 2580.
Ensure that the system (or area) is turned off.
1. Press [MENU] + [1] + [1] + [1]. The keypad will display a list of available users that you can change their PIN.
| U001 JOHN SMITH |
|---|
| U002 DEBBIE SMITH |
| U003 USER 3 NAME |
| Press ▲▼ OK or MENU |
Use the [↑] and [↓] keys to select the user that you want to change the PIN, then press [OK] to select. Alternatively, you can enter the user number you want to change, then press [OK ].
| Please Enter PIN for |
|---|
| DEBBIE SMITH U002, |
| Then Press OK. |
4. Enter the new PIN.
If an error tone sounds, try a different PIN.
5. Press [OK] to save and exit, or press [MENU] to exit without saving.
Add PIN – MENU 1-1-2
This menu allows a Master user to add a PIN to a new user. A Master user can only program a new PIN for those users that have been assigned to the same area(s) as the Master user.
At factory default, each PIN is fixed to 4 digits in length. The default PIN for User 1 (Master user) is 2580.
1. Enter [MENU] + [1] + [1] + [2]. A list of users will display on the keypad.
| U001 JOHN SMITH |
|---|
| U002 DEBBIE SMITH |
| U003 USER 3 NAME |
| Press ▲▼ OK or MENU |
2.Use the [↑] and [↓] keys to select the user that you want to add a PIN, then press [OK] to select. Alternatively, you can enter the user number you want to add, then press [OK]. The keypad will prompt you to enter the new pin.
| Enter New PIN for |
|---|
| User 3 Name U003 |
| Press OK or MENU |
3. Enter the new PIN for the user you have selected.
If an error tone sounds, try a different new PIN.
4. Press [OK] to save and exit, or press [MENU] to exit without saving.
Delete PIN – MENU 1-1-3
This menu allows a Master user the ability delete other users PIN’s. A Master user can only delete a PIN for those users that have been assigned to the same area(s) as the Master user. A Master user cannot delete their own PIN.
1. Make sure that the system is turned off.
2. Press [MENU] + [1] + [1] + [3].
The keypad will list all users that you can delete.
| U001 JOHN SMITH |
|---|
| U002 DEBBIE SMITH |
| U003 USER 3 NAME |
| Press ▲▼ OK or MENU |
Use the [↑] and [↓] keys to select the user that you want to add a PIN, then press [OK] to select. Alternatively, you can enter the user number you want to add, then press [OK].
| Press OK to delete PIN |
|---|
| For U002 DEBBIE SMITHPress OK or MENU |
4. Press [OK] again to delete the PIN, or press [MENU] to cancel.
Add Token – MENU 1-2-0
This menu allows a Master user the ability to add a new token for for those users that have been assigned to the same area(s) as the Master user.
1. Enter [MENU] + [1] + [2] + [0]. A list of users will display on the keypad.
2. Use the [↑] and [↓] keys to select the user that you want to add a token for, then press [OK] to select.
| U001 JOHN SMITH |
|---|
| U002 DEBBIE SMITH |
| U003 USER 3 NAME |
| Press ▲▼ OK or MENU |
3. If you are using a keypad with built in reader the system will prompt you to present the token to the keypad. Once the token is presented the keypad we beep and return to the menu.
| To Add token for U001 |
|---|
| JOHN SMITH swipe new token |
4. If you are learning the token via an external reader the system will prompt you to select the reader to learn from. Use the [↑] and [↓] keys to select the reader and then repeat step 3 presenting the token to the external reader.
A Master user can only delete a PIN for those users that have been assigned to the same area(s) as the Master user. A Master user cannot delete their own PIN.
Delete Token – Menu 1-2-1
This menu allows a Master user the ability to delete a token for those users that have been assigned to the same area(s) as the Master user.
1. Enter [MENU] + [1] + [2] + [1]. A list of users will display on the keypad.
2. Use the [↑] and [↓] keys to select the user who’s token you want to delete, then press [OK] to select.
| U001 JOHN SMITH |
|---|
| U002 DEBBIE SMITH |
| U003 USER 3 NAME |
| Press ▲▼ OK or MENU |
3. When prompted press the [OK] key to confirm token deletion.
Token Status – MENU 1-2-2
This menu allows a Master user the ability to identify a token which has been programmed into the system. Only tokens that have been assigned to the same area(s) as the Master user can be identified.
1. Enter [MENU] + [1] + [2] + [2]. The system will prompt you to present the token to the keypad.
2. Once the token is presented the system will display the owner of the token.
| Token belongs to ur002 |
|---|
| DEBBIE SMITH |
| Press OK or MENU |
RF Keyfob
This section outlines how to add and delete RF keyfobs that allow an alternate method for users to turn an area(s) on and off. The RF Keyfob must be compatible with the RF Receiver that has been installed by the security company.
Add Keyfob – MENU-1-3-0
This menu allows the security installer or a master user to program the user’s keyfob ID number.
1. Enter [MENU] + [1] + [3] + [0]. A list of users will display on the keypad.
| U001 JOHN SMITH |
|---|
| U002 DEBBIE SMITH |
| U003 USER 3 NAME |
| Press ▲▼ OK or MENU |
2. Use the [↑] and [↓] keys to select the user that you want to add the RF keyfob ID, then press [OK] to select. Alternatively, you can enter the user number you, then press [OK]. The keypad will prompt you to enter the RF keyfob ID number:
| Enter keyfob RFid for U016 User 16 Name 00000000 |
|---|
| Press OK or MENU |
3. Enter the RF Keyfob ID Number
4. Press [OK] to save and exit, or press [MENU] to exit without saving.
Delete Keyfob – Menu 1-3-1
This menu allows the security installer or a master user to delete the RF keyfob ID that has been assigned to a user.
1. Enter [MENU] + [1] + [3] + [1].
A list of users will display on the keypad.
| U001 JOHN SMITH |
|---|
| U002 DEBBIE SMITH |
| U003 USER 3 NAME |
| Press ▲▼ OK or MENU |
2. Use the [↑] and [↓] keys to select the user that you want to delete the keyfob, then press [OK] to select. Alternatively, you can enter the user number, then press [OK].
| OK to delete Keyfob for U002 Debbie Smith 009553507 |
|---|
| Press OK or MENU |
3. Press [OK] to delete the RF Keyfob ID number and exit, or press [MENU] to exit without saving.
User Name – Menu 1-4-0
This menu allows the master user to program the user’s name. A maximum of 16 characters can be entered.
1. Enter [MENU] + [1] + [4] + [0].
A list of users will display on the keypad.
| U001 JOHN SMITH |
|---|
| U002 DEBBIE SMITH |
| U003 USER 3 NAME |
| Press ▲▼ OK or MENU |
2. To program the user name, use the [↑] and [↓] keys to select the user that you want to program, then press [OK] to select. Alternatively, you can enter the user number you want to program, then press [OK].
The keypad will display the current user name.
| User Name U001 |
|---|
| User 1 Name |
| Press ◄►▲▼ OK or MENU |
3. Use the [←] and [→] keys to scroll the cursor left and right across the user name text. Use the [↑] and [↓] keys to scroll through the different characters available. To clear all text from the cursor position to the right, press the [OFF] key.
4. When the user name is complete, press [OK] to save and exit, or press [MENU] to exit without saving.
Area Assignment – Menu 1-4-1
This menu allows the master user to program which areas (1 to 8) a user can access. Each user can be assigned to one or multiple areas. The master user is restricted and can only assign another user to any one or multiple areas that the master user has been assigned to. At factory default, each user is assigned to operate Area 1.
1. Enter [MENU] + [1] + [4] + [1].
A list of users will display on the keypad.
2. To assign areas to a user, use the [↑] and [↓] keys to select the user that you want to program, then press [OK] to select. Alternatively, you can enter the user number you want to program, then press [OK].
The keypad will display which areas the user has been assigned to.
| ✓ Area 1 |
|---|
| Area 2 |
| Area 3 |
| Press ▲▼ OK ON OFF MENU |
3. Use the [↑] and [↓] keys to select the area that you want to assign to the user. Press the [ON] key to assign the user to the area (✓)will display) or press the [OFF] key to disable the user from the corresponding area. (✓ will no longer display).
4. Repeat Step 3 until you have assigned the user to all areas that are required.
5. Press [OK] to save and exit, or press [MENU] to exit without saving.
Understanding Timer Groups
Timer Groups are used to restrict users from operating doors outside given times, days or holidays. To do this you need to create a time group, then assign one or more schedules to the time group to specify the access period, day of the week and holidays. To now restrict the user, they must belong also to the same timer group. This now restricts the user from accessing the system outside the nominated times and days within the schedules linked to the timer group.
User
Can only belong to 1 timer group.
Schedules
Multiple schedules can be linked to the same timer group.
Time Groups
There are 8 different timer groups available.
Timer Group Example
1. To set up a timer group you need to select an unused timer group number from 1 to 8, in this example we will assume timer group number to be 5.
2. Select an unused schedule and program the times and day of the week then assign the schedule to timer group 5
3. Then under user properties assign the users who you wish to restrict to timer group 5. Remember that you are only able to assign a user to one access group.
A master code holder is able to change the schedules so they can change the access times for a given user. If a user tries to operate the system outside their assigned timer group periods then access will be denied.
Timer Group – Menu 1-4-4
This menu is used to assign a User to a Timer Group. Timer Groups can be used to restrict User access to be within specific times defined by schedules. Each User can only be assigned to one Timer Group. Setting this option to 0 will give the User 24 hour access to the system.
1. Enter [MENU] + [1] + [4] + [4] and select the user from the list then press [OK].
| U001 JOHN SMITH |
|---|
| U002 DEBBIE SMITH |
| U003 USER 3 NAME |
| Press ▲▼ OK or MENU |
2. Using the numeric keys, enter the Timer Group. Valid entries are 1 – 8 or 0 to disable.
| Timer Group Ur001 00 |
|---|
| Press 0-9 OK to SAVE |
3. Press [OK] to save and exit or press [MENU] to exit without saving.
Access Assignment – Menu 1-4-5
This menu allows you to assign each user to one or more access groups. An access group is used to allow and/or restrict which users have access to various system outputs. These outputs can be used to control door strikes, gates or roller doors etc.
1. Enter [MENU] + [1] + [4] + [5] and select the user from the list then press [OK].
| U001 JOHN SMITH |
|---|
| U002 DEBBIE SMITH |
| U003 USER 3 NAME |
| Press ▲▼ OK or MENU |
2. Use the up and down arrow keys to highlight the Access Group then press the [ON] key to select or the [OFF] key to deselect.
| ✓ Access Group 1 |
|---|
| Access Group 2 |
| Access Group 3 |
| Press ▲▼ OK ON OFF MENU |
3. Repeat Step 2 until all required Access Groups are programmed, then press [OK] to save and exit or press [MENU] to exit without saving.